
Introduction
Installing a driveway with pavers is one of the most effective ways to enhance your home’s curb appeal, durability, and functionality. Whether you are replacing an old driveway or installing a new one, understanding the proper installation process ensures long-lasting results. Quartz Demolition & Construction specializes in professional driveway paver installation throughout the Bay Area, combining expert craftsmanship, modern equipment, and quality materials. In this guide, we will walk homeowners through every step of the driveway pavers installation process.
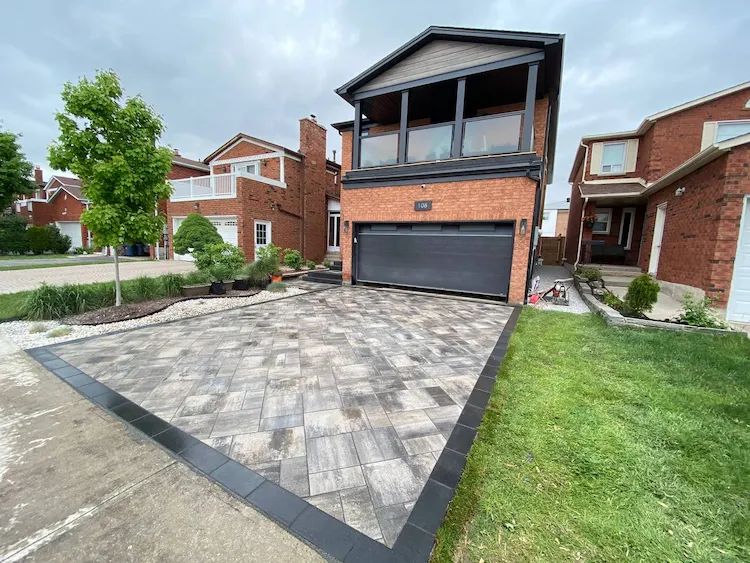
Feature Image Suggestion:
- High-resolution image of a driveway being installed with interlocking pavers, showing construction equipment, workers, and leveling tools.
- Example search keywords: “driveway paver installation”, “paver driveway construction”, “residential paver driveway project”.
1. Planning Your Driveway Pavers Project
Proper planning is the first step for a successful paver driveway installation:
- Measure the total area for accurate material estimation.
- Determine driveway shape, layout, and design patterns.
- Decide on paver material (concrete, brick, or natural stone) based on durability and aesthetics.
- Check local building codes, permits, and HOA regulations.
At Quartz Demolition & Construction, our team conducts a site survey to plan your driveway precisely, ensuring proper slope, drainage, and aesthetic alignment.
2. Choosing the Right Pavers
Selecting the right pavers is essential for durability and style. Consider:
- Material: Concrete pavers are cost-effective and durable, natural stone offers premium aesthetics, and brick provides classic appeal.
- Shape and Size: Rectangular, square, or cobblestone pavers can create different visual patterns.
- Color: Choose a color that complements your home exterior and landscape.
- Thickness: Standard driveways require 60–80mm thick pavers for vehicle load.
Our experts help homeowners select pavers that suit both the property design and functional requirements.
3. Excavation and Site Preparation
Before installing pavers, proper site preparation is critical:
- Excavate the driveway area to a depth of 8–12 inches, depending on paver thickness and base layers.
- Remove old concrete, asphalt, or soil debris.
- Ensure proper slope for water drainage (typically 1–2% slope away from the house).
Quartz Demolition & Construction uses Bobcat equipment and skilled operators to perform precise excavation efficiently.
4. Installing the Base Layer
A solid base is crucial for a durable paver driveway:
- Lay 4–6 inches of crushed gravel or compacted stone.
- Use a plate compactor to compact the base and prevent settling.
- Add a layer of sand (about 1 inch) for leveling the pavers.
This base ensures the driveway remains stable, prevents paver movement, and avoids cracking over time.
5. Laying the Pavers
With the base ready, you can start laying pavers:
- Start from one corner, preferably at the garage entrance.
- Use a straight edge or string line to maintain alignment.
- Lay pavers in the chosen pattern (herringbone, basket weave, or running bond).
- Leave a small gap (1/8–1/4 inch) between pavers for sand filling.
Professional installation ensures the pattern remains straight and the driveway surface is smooth and level.
6. Cutting and Fitting Pavers
Driveways often require custom cuts to fit edges, curves, and obstacles:
- Use a wet saw or paver splitter for clean cuts.
- Carefully measure gaps to avoid uneven edges.
- Quartz Demolition & Construction ensures all cuts match the overall layout for a polished finish.
Proper cutting guarantees the driveway looks professional and functions efficiently.
7. Filling Joints with Sand
Once all pavers are laid:
- Sweep polymeric sand or fine sand into the gaps between pavers.
- Compact the pavers with a plate compactor to settle the sand.
- Sweep additional sand to fill remaining gaps.
This locks the pavers in place, reduces weed growth, and provides stability for heavy vehicle loads.
8. Edge Restraints Installation
Edge restraints prevent pavers from shifting over time:
- Install plastic, metal, or concrete edge restraints along driveway borders.
- Secure restraints firmly to the base layer using spikes or anchors.
Quartz Demolition & Construction installs edge restraints for maximum longevity and to maintain a clean, defined border.
9. Cleaning and Sealing the Driveway
Sealing your paver driveway adds protection and aesthetic appeal:
- Sweep debris and wash the driveway before sealing.
- Apply a high-quality paver sealer to enhance color and protect from stains.
- Avoid heavy traffic for 24–48 hours after sealing.
Sealing increases durability, prevents fading, and makes maintenance easier over time.
10. Maintenance Tips for a Long-Lasting Driveway
To ensure your driveway remains in excellent condition:
- Regularly sweep debris and leaves.
- Refill joint sand as needed.
- Inspect for paver movement or settling, and repair promptly.
- Clean stains immediately to prevent permanent discoloration.
Quartz Demolition & Construction provides maintenance advice and services to keep your driveway looking brand new for years.
Conclusion
Installing a driveway with pavers requires proper planning, site preparation, high-quality materials, and expert installation. Following these steps ensures your driveway is durable, visually appealing, and functional.
For homeowners in the Bay Area, Quartz Demolition & Construction offers professional driveway paver installation, excavation, grading, and concrete services. Our experienced team guarantees safe, efficient, and high-quality results for every project.